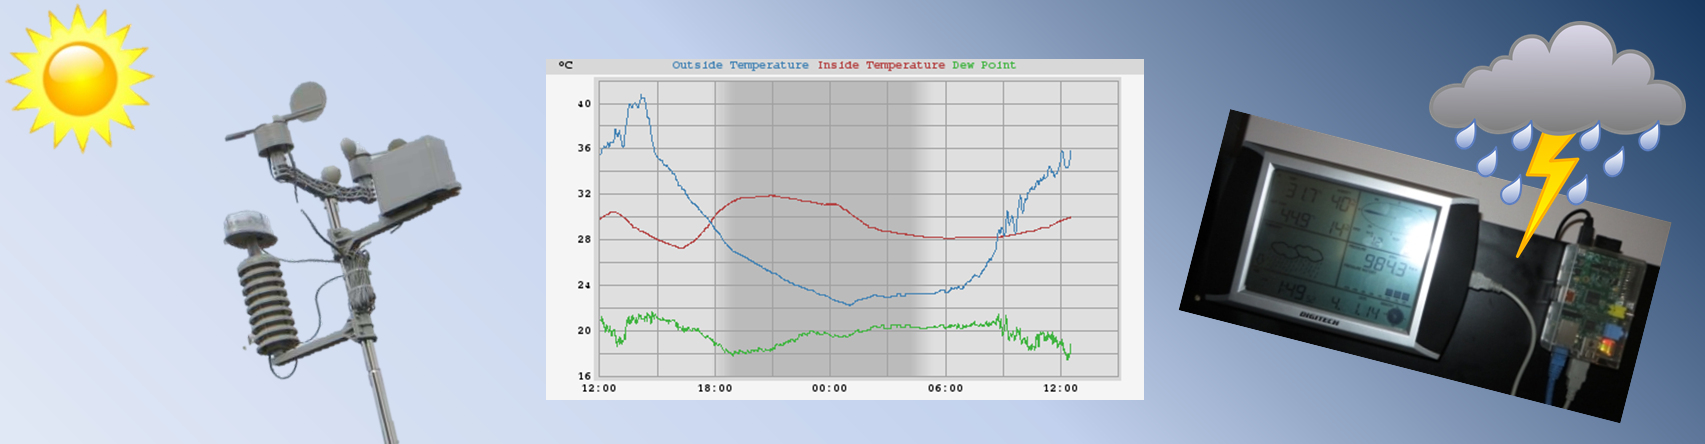
I have had my weather station reporting to my website via a Raspberry Pi for seventeen months now and I enjoyed tinkering with it over that time. In addition to the Raspberry Pi, I have seen references to the Arduino which is a microcontroller and I’m intrigued by that as well. It looks very promising for setting up other sensors around the place that I can monitor. One project that comes to mind is monitoring the water level in my tank.
The other day I bit the bullet and bought a Freetronics Experimenters Kit for Arduino. The heart of the kit is the Freetronics Eleven which is an Arduino Uno clone. I also grabbed a Humidity and Temperature Sensor Module (DHT22) while I was there.
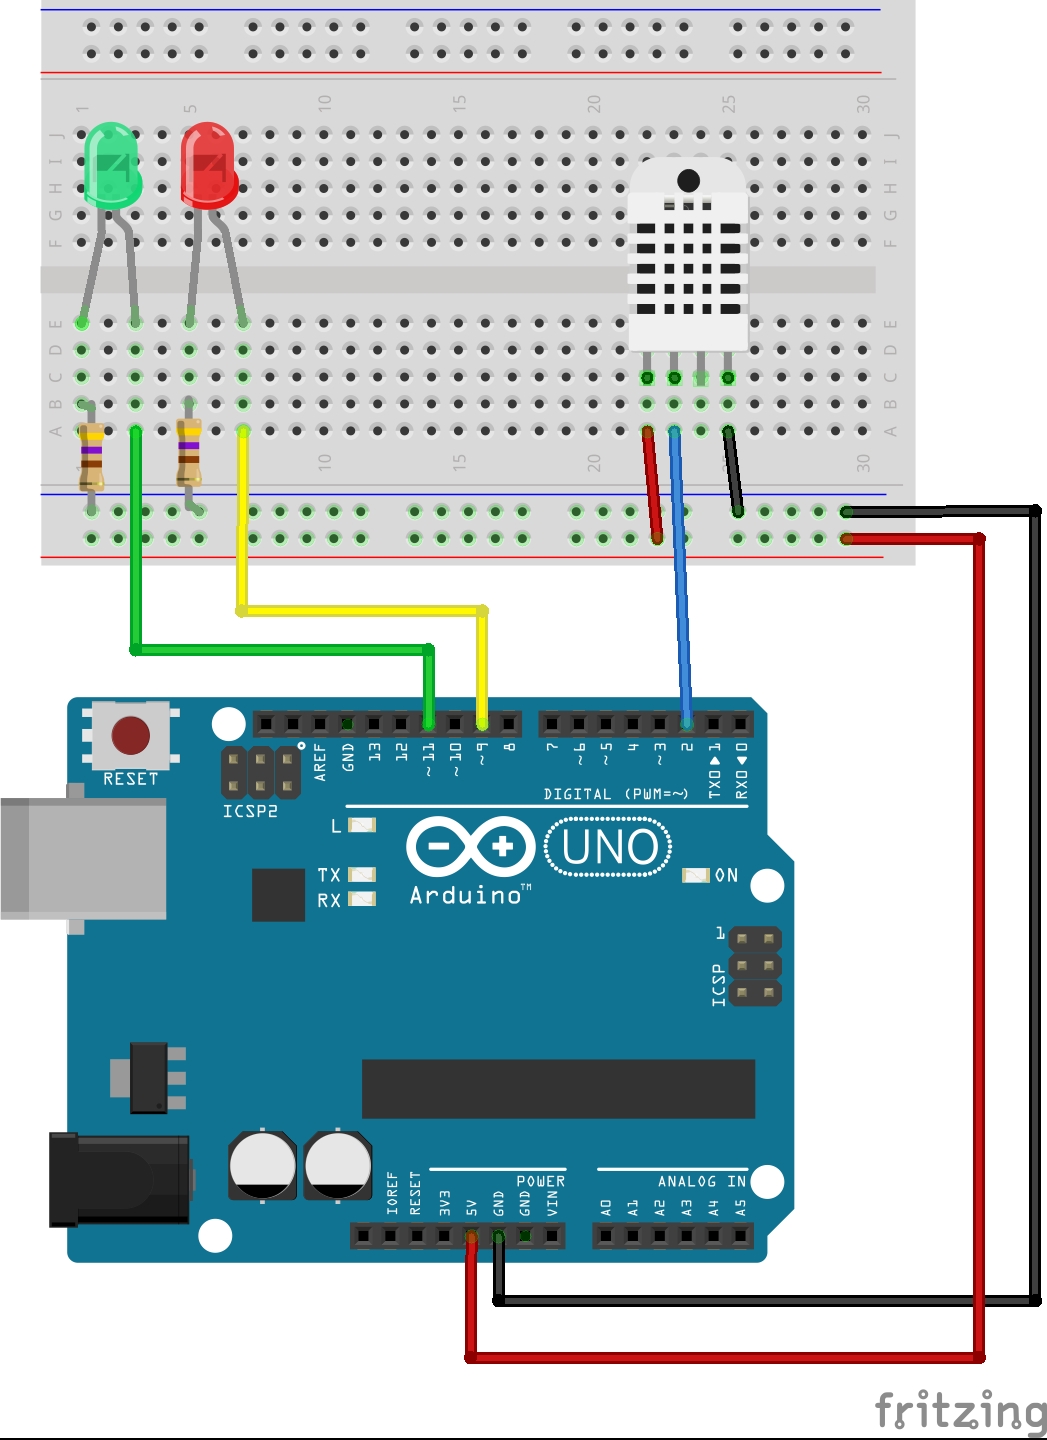
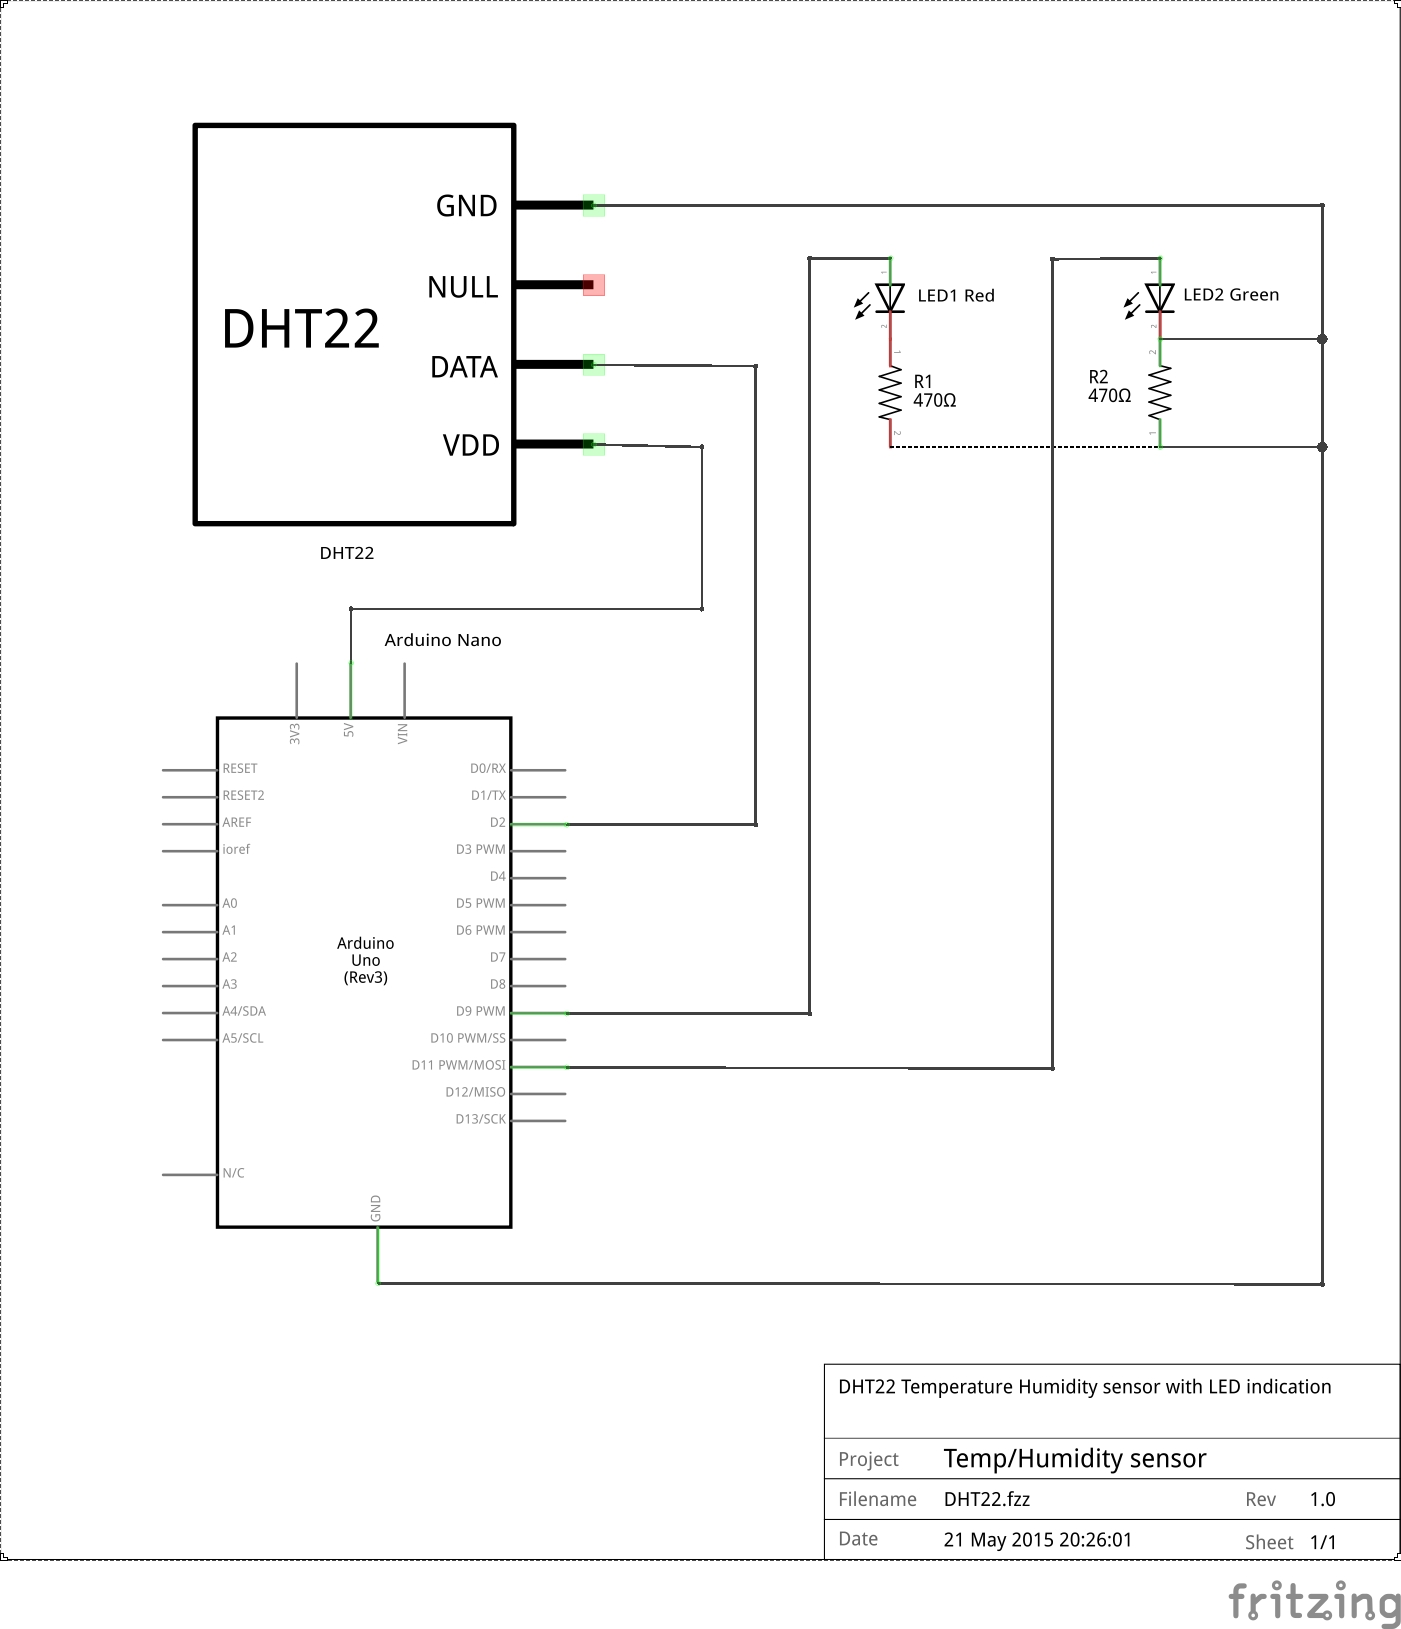
I was playing with the arduino tonight and set up a simple circuit with the humidity and temperature sensor and a couple of LEDs. I also discovered the Fritzing programme which enables me to draw a schematic of my circuit and show the breadboard layout. So much fun to be had!
What you have to do is set up your circuit, connect it to your PC and then upload a sketch to it. The sketch is the code that you write to control the Arduino. This code is based on the C language.
Anyway, for the sake of having a play, I thought a simple experiment I could do is measure the humidity and temperature, output the results to the screen and also set up a couple of LEDs so that if the temperature is greater or equal to 25°C, then a red LED lights but if the temperature falls below 25°C then a green LED lights.
Here is my circuit:
Here is the sketch which I put together based on some examples I found:
#include "DHT.h"

#define DHTPIN 2     // what pin we're connected to

#define DHTTYPE DHT22   // DHT 22  (AM2302)

DHT dht(DHTPIN, DHTTYPE);

int redLed = 9;
int greenLed = 11;
float time;

void setup() {
  Serial.begin(9600);
  Serial.println("DHT test");

  dht.begin();

  pinMode(redLed, OUTPUT);
  pinMode(greenLed, OUTPUT);
}

void loop() {
  // Reading temperature or humidity takes about 250 milliseconds!
  // Sensor readings may also be up to 2 seconds 'old' (its a very slow sensor)
  float h = dht.readHumidity();
  float t = dht.readTemperature();

  // check if returns are valid, if they are NaN (not a number) then something went wrong!
  if (isnan(t) || isnan(h)) {
    Serial.println("Failed to read from DHT");
  } else {
    Serial.print("Time: ");
    time = millis()/1000;
    Serial.print(time);
    Serial.print(" secs\t");
    Serial.print("Humidity: ");
    Serial.print(h);
    Serial.print(" %\t");
    Serial.print("Temperature: ");
    Serial.print(t);
    Serial.println(" *C");
  }
  // Turn red LED on and green LED off if the temperature is 25 degrees or more.
  // Turn green LED on and red LED off if the temperature is less than 25 degrees.
  if (t >= 25) {
    digitalWrite(redLed, HIGH);
    digitalWrite(greenLed, LOW);
  }
  else {
    digitalWrite(redLed, LOW);
    digitalWrite(greenLed, HIGH);
  }
  // Wait 5 seconds before starting the next reading.
  delay(5000);
}
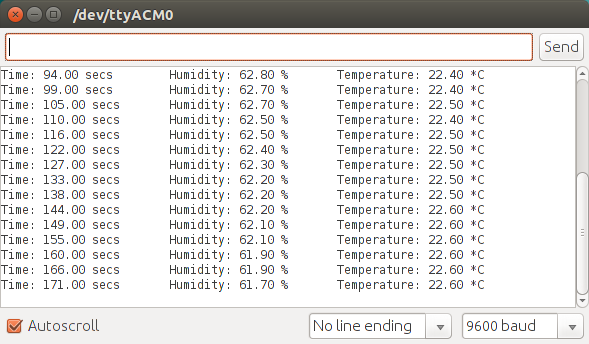
And finally, the results as printed to the screen:
The water tank level indicator idea has been running through my head and I reckon I know how to do it. I have ordered a heap of parts from eBay so once they turn up I will get into it. Think ultrasonic sensor, solar powered transmitter, received by the Raspberry Pi, uploaded to a database and displayed on the web. I will be posting my progress (good or bad) on here so stay tuned… 🙂